Adult, Child, and Infant CPR: What Is Covered in Class?

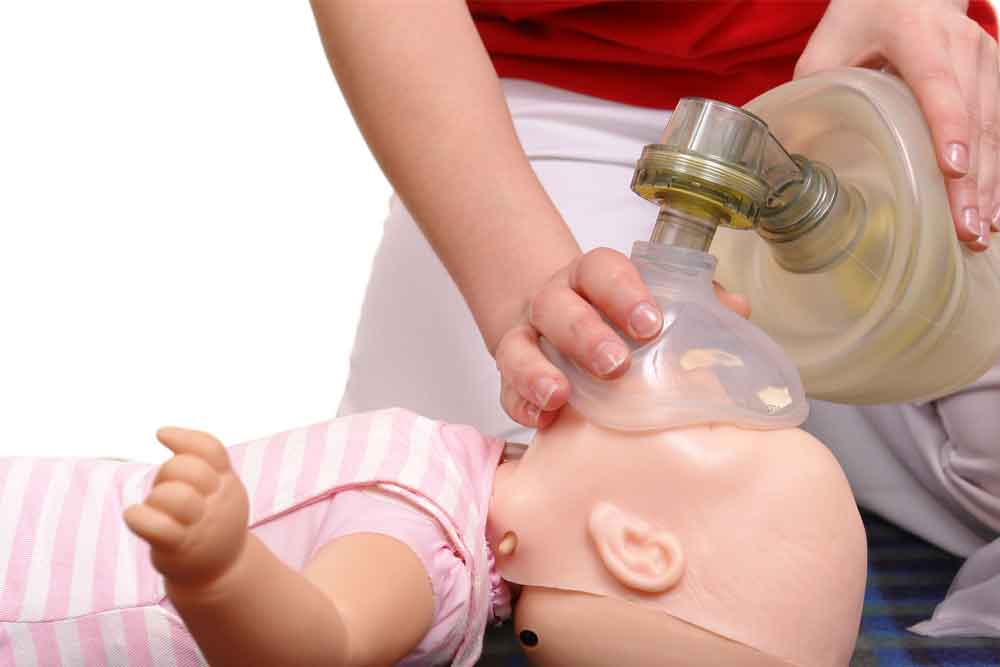
Giving CPR to an Infant

Walking into your first CPR class can feel a bit overwhelming. You know you’re there to learn how to save a life, but the technicalities of “compression-to-breath ratios” and “depth of force” can sound like a lot to manage. Whether you are a new parent, a dedicated teacher, or a workplace safety officer, understanding the nuances of Adult, Child, and Infant CPR is the cornerstone of emergency preparedness.

In this guide, we’ll pull back the curtain on what actually happens during a certification course. You will learn how the techniques shift based on the size of the victim, how to use life-saving technology like an AED, and why “hands-on” practice is the only way to truly gain confidence. By the end of this post, you’ll see that while the steps are specific, they are entirely masterable for anyone willing to learn.

Why do techniques differ for Adult, Child, and Infant CPR?

The most common question students ask is why we can’t just use the same method for everyone. The answer lies in human physiology. An adult’s skeletal structure is rigid and requires significant force to compress the chest enough to circulate blood. Conversely, an infant’s bones are still developing and very flexible; using adult-level force could cause internal damage.

In a professional CPR class, you’ll learn that “Adult” generally refers to anyone who has reached puberty, “Child” is from age one to puberty, and “Infant” is anyone under one year old. Your instructor will show you how to quickly “size up” a victim to determine which protocol to use. The goal is always the same—to act as a manual pump for the heart—but the tools (your hands, fingers, and breath) must be calibrated to the victim.

What are the specific steps for Adult CPR training?

Adult CPR is the foundation of most classes. Because cardiac arrest in adults is often caused by a heart issue, the focus is on high-quality chest compressions to keep oxygenated blood moving to the brain.

In class, you will practice:

  • Scene Safety and Assessment: Learning how to check if the environment is safe for you and the victim before you begin.
  • Chest Compressions: Using two hands, interlocked, in the center of the chest. You’ll learn to push down at least 2 inches at a rate of 100 to 120 beats per minute (think of the rhythm of “Stayin’ Alive”).
  • Rescue Breaths: Mastering the head-tilt/chin-lift maneuver to open the airway and delivering two breaths that make the chest visibly rise.
  • The 30:2 Ratio: Hard-coding the cycle of 30 compressions followed by 2 breaths into your muscle memory.

How does Child CPR differ from Adult CPR?

When it comes to children, the emergency is often respiratory-based (like drowning or choking) rather than a primary heart problem. This makes the “rescue breath” portion of the training particularly vital.

During the “Child” module of your class, you will focus on:

  • One-Handed vs. Two-Handed Compressions: Depending on the size of the child, you may only need the heel of one hand to reach the required 2-inch depth.
  • Modified Force: You’ll practice pressing down about one-third the depth of the chest, ensuring you aren’t using the full weight of your upper body as you would for an adult.
  • Prevention and Recognition: Instructors often touch on common childhood emergencies and how to spot the signs of respiratory distress before the heart stops.

What is included in Infant CPR instruction?

Infant CPR is perhaps the most delicate part of the course. It requires a high level of precision because you are working with a very small surface area.

What you will practice on infant manikins:

  • The Two-Finger Technique: Instead of using your palms, you use two fingers (or two thumbs with the hands-encircling technique) in the center of the chest.
  • 1.5 Inch Depth: Learning the “feel” of a shallower compression.
  • Puffs, Not Breaths: Because an infant’s lungs are small, you don’t give a full breath. You provide “puffs” of air using your cheeks, covering both the infant’s nose and mouth with your mouth to create a seal.
  • Response Checks: Instead of shaking the shoulders, you’ll learn to flick the bottom of the baby’s foot to check for responsiveness.

How do we learn to use an AED for all ages?

An Automated External Defibrillator (AED) is a device that can literally restart a heart. Most modern Adult, Child, and Infant CPR classes include a dedicated AED module because using one along with CPR can more than double the victim’s chance of survival.

You will learn:

  • Device Operation: How to turn the device on and follow the voice prompts (it tells you exactly what to do).
  • Pad Placement: Where to place the adhesive pads on an adult’s chest versus a child’s or infant’s chest.
  • Pediatric Settings: How to use “pediatric pads” or a “child key” to reduce the energy of the shock for smaller victims.
  • Clearance: The importance of making sure no one is touching the victim when the shock is delivered.

What are the choking relief maneuvers covered in class?

Choking is a leading cause of accidental death, especially in children and the elderly. A comprehensive class will teach you how to clear an airway for every age group.

  • For Adults and Children: You will practice the abdominal thrust (Heimlich Maneuver), learning exactly where to place your fists to create the necessary upward pressure.
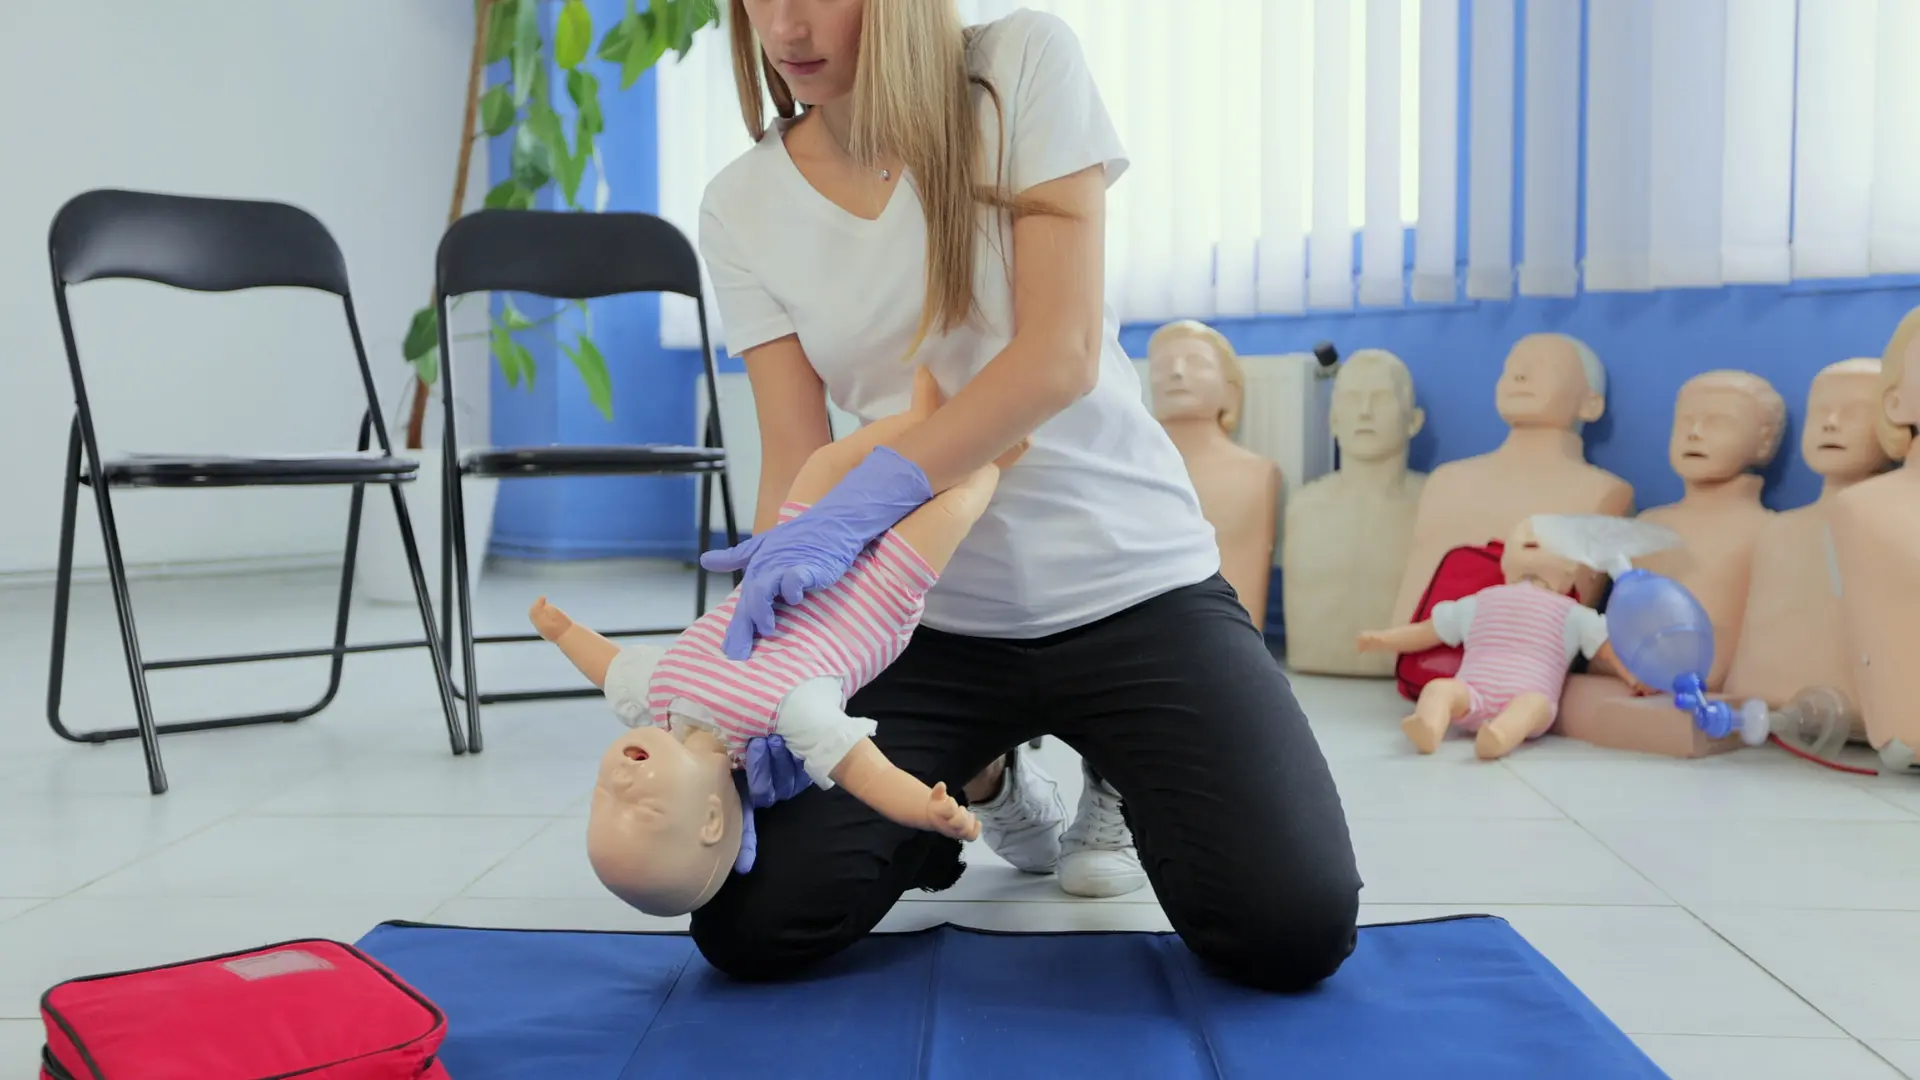
  • For Infants: You will learn the “5 back blows and 5 chest thrusts” method. This involves supporting the infant face-down on your forearm to let gravity help clear the obstruction.
  • Self-Relief: Many instructors will also show you how to perform a modified version of these maneuvers on yourself if you are alone and choking.

What should I expect during the hands-on skills test?

To receive your certification, you won’t just watch videos; you have to demonstrate that you can perform the skills.

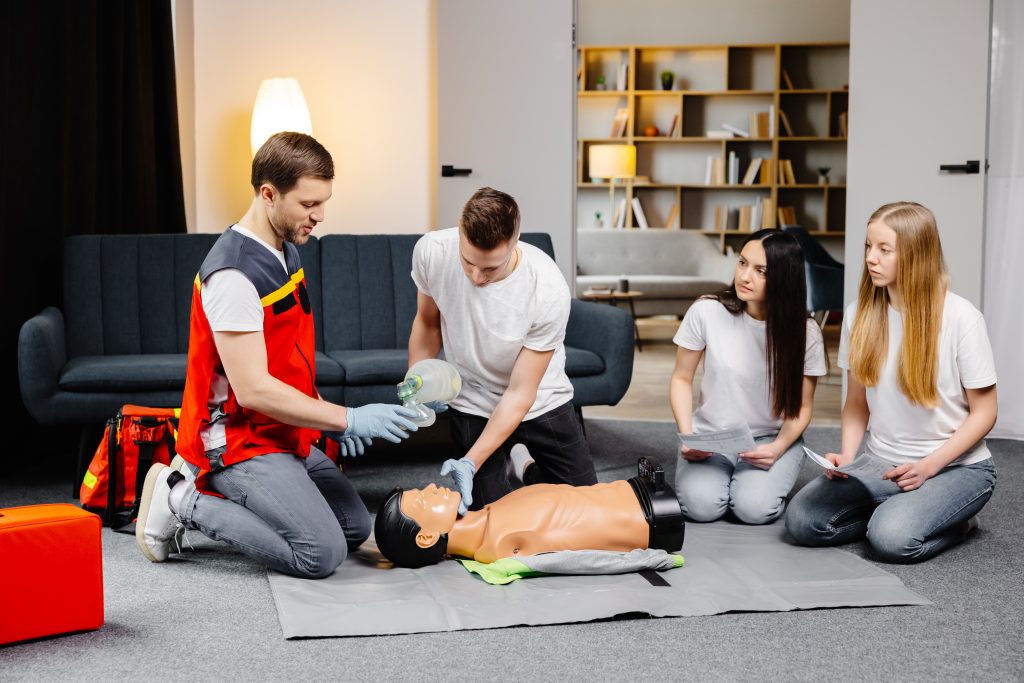
At CPR Classes Near Me, we prioritize “Practice-While-Watching.” This means you’ll have a manikin in front of you for the duration of the class. You’ll perform cycles of CPR while an instructor watches your form, correcting your hand placement or compression depth in real-time. This real-world application is what builds the “active” knowledge required to stay calm in a crisis.

Conclusion: Your Next Steps toward Preparedness

Learning Adult, Child, and Infant CPR is one of the most selfless and practical skills you can acquire. Whether you’re protecting your own family or fulfilling a requirement for your career, the knowledge gained in these few hours has the potential to change a life’s trajectory. You’ve now seen that the class covers everything from the force of a compression to the nuances of an AED shock.

Don’t wait for an emergency to realize you aren’t prepared. The confidence you need is only a class away.

Ready to gain these life-saving skills? Contact CPR Classes Near Me today to find a certification course that fits your schedule!

FAQ Section

How long does an Adult, Child, and Infant CPR class take?

Most comprehensive classes that cover all three age groups take between 3 and 4 hours to complete. This includes video instruction, hands-on practice, and the final skills assessment. Some “blended” options allow you to do the classroom portion online, reducing the in-person time to about 1 to 2 hours.

Do I need a separate certification for infants and adults?

No, most standard “CPR/AED” or “Healthcare Provider” courses are designed to be “all-ages” certifications. These courses bundle Adult, Child, and Infant CPR into one curriculum so you are prepared for any scenario. Always check the course description to ensure “Pediatric” or “Infant” modules are included.

Is there a written test for CPR certification?

Depending on the certifying body (like the AHA), there may be a short multiple-choice exam at the end of the class. However, the most important part of the process is the “skills check,” where you demonstrate the physical techniques on a manikin to the satisfaction of your instructor.

How often do I need to renew my CPR training?

CPR certifications are typically valid for two years. This is because research shows that CPR skills can degrade over time, and medical guidelines are updated periodically to reflect the latest life-saving science.

Can I hurt someone by performing CPR?

While it is possible to crack a rib during high-quality compressions, it is important to remember that the person is clinically dead if their heart has stopped. A cracked rib can heal; brain death from lack of oxygen cannot. Training helps you apply the correct amount of force to be effective while minimizing unnecessary injury.

CPR Certification for Teachers: Why CPR, AED, and First Aid Training is a Classroom Essential

As a teacher, your “to-do” list is never-ending. Between lesson planning, grading, and managing a classroom, adding “get CPR certified” might feel like just another box to check. However, in the world of education, being prepared for the unexpected isn’t just a recommendation—it’s a core part of the job.

Whether you are a preschool teacher watching over toddlers or a high school coach on the sidelines, medical emergencies don’t wait for a convenient time. From choking in the cafeteria to a sudden cardiac event during gym class, the few minutes before paramedics arrive are the most critical.

In this guide, we’ll explore everything educators need to know about CPR, AED, and First Aid certification, including state requirements and how to find the right class for your busy schedule.

Why is CPR certification mandatory for teachers in many states?

In many parts of the United States, CPR certification is a non-negotiable requirement for obtaining or renewing a teaching license. States like Virginia, Indiana, and California have specific laws requiring educators to prove they are trained in emergency response.

The reason is simple: safety and liability. Schools are high-activity environments where accidents are prone to happen. By requiring certification, state boards of education ensure that:

  • Every classroom has a protector: Students spend the majority of their day with teachers. Having a trained professional in the room reduces the “response gap” during an emergency.
  • Licensing standards are met: Certification ensures that all educators meet a baseline level of competency in life-saving measures.
  • Legal protection is provided: Many regions offer “Good Samaritan” protections to certified individuals who act in good faith during an emergency.

What are the specific CPR and AED needs for school environments?

School-based emergencies are unique because they involve different age groups. A high school teacher needs to know how to perform adult CPR, but an elementary school teacher must be proficient in child and infant techniques.

The Role of the AED in Schools

Sudden Cardiac Arrest (SCA) is the leading cause of death on school campuses. While we often think of heart issues as “adult problems,” SCA can affect student-athletes and children with undiagnosed heart conditions.

  • Speed is Key: For every minute that passes without a shock from an AED, the chance of survival drops by 7–10%.
  • Accessibility: Most modern schools are equipped with AEDs, but they are only effective if a teacher knows where they are and how to turn them on.
  • Ease of Use: Modern AEDs provide voice prompts to guide you through the process, but hands-on training builds the confidence needed to use one under pressure.

Why is First Aid training just as important as CPR?

While CPR is for life-or-death heart and lung emergencies, First Aid covers the “everything else” that happens daily in schools. A comprehensive certification for teachers almost always includes a First Aid component.

Common School Emergencies Covered in First Aid:

  1. Allergic Reactions: Knowing how to recognize anaphylaxis and properly administer an epinephrine auto-injector (EpiPen).
  2. Asthma Attacks: Helping a student use an inhaler while keeping them calm.
  3. Choking: Mastering the Heimlich maneuver for various age groups.
  4. Injuries: Treating everything from playground scrapes and nosebleeds to broken bones and head injuries from sports.
  5. Seizures: Learning how to keep a student safe and clear the area during a seizure event.

What should teachers look for in a CPR class?

Not all CPR classes are created equal. For teachers, the “gold standard” is a course that offers a mix of convenience and compliance.

  • Hands-On Skills Practice: Many school districts will not accept 100% online certifications. You generally need a “blended” course that includes an in-person skills check with a manikin.
  • Age-Specific Training: Ensure the course covers Adult, Child, and Infant CPR.
  • Nationally Recognized Curriculum: Look for courses that follow the latest evidence-based guidelines, such as those provided by major national health organizations.
  • Instructor Experience: It’s helpful to learn from instructors who have real-world experience, such as former first responders or healthcare professionals.

How long does teacher CPR certification last?

Most CPR and First Aid certifications for educators are valid for two years. It is important to keep track of your expiration date, as teaching licenses can be put at risk if your certification lapses.

We recommend starting your renewal process at least 30 days before your card expires to ensure you can find a local class that fits your schedule.

Can teachers take CPR classes together as a group?

Absolutely. Many schools find it most efficient to host “on-site” training days. This allows the entire staff to get certified at once, fostering a “culture of safety” where everyone is on the same page regarding the school’s emergency action plan.

Benefits of Group Training:

  • Consistency: Every teacher learns the same protocols.
  • Team Building: Practicing life-saving skills together builds trust among staff.
  • Convenience: The instructor comes to your school, saving teachers from traveling to a training center.

How does CPR certification benefit a teacher’s professional development?

Beyond the legal requirements, being CPR certified is a valuable addition to your professional resume.

  • Increased Confidence: Educators report feeling less anxious about playground duty or field trips when they know they can handle a crisis.
  • Parental Trust: Parents feel significantly more comfortable leaving their children in the care of a teacher who is officially certified in life-saving measures.
  • Leadership Opportunities: Teachers with advanced safety training are often preferred for roles like Lead Teacher, Department Head, or Athletic Coach.

Conclusion: Preparedness is the Best Lesson Plan

In the classroom, you teach your students that preparation is the key to success. The same applies to safety. CPR, AED, and First Aid certification isn’t just a requirement—it’s a promise to your students and their families that you are ready to protect them, no matter what happens.

If you are an educator in need of certification or a school administrator looking to train your staff, don’t wait until an emergency occurs. Ensuring your skills are up-to-date is the most important “lesson” you’ll ever master.

Ready to get certified? Contact CPR Classes Near Me today to find a convenient, accredited class in your area or to schedule a group training session for your school!

Frequently Asked Questions (FAQ)

Q: Does my CPR certification need to include “Healthcare Provider” (BLS) level training?

A: Usually, no. Most K-12 teachers only need “Heartsaver” or “Community” level CPR/AED and First Aid. However, school nurses and some athletic trainers may be required to have the more advanced Basic Life Support (BLS) certification. Always check with your specific district.

Q: Can I get certified entirely online?

A: While online-only courses exist, most school districts and state licensing boards require a “hands-on” skills assessment. Blended learning (online theory + in-person practice) is the most popular and widely accepted option for teachers.

Q: Is infant CPR really necessary for high school teachers?

A: While high schoolers are treated with adult techniques, it is still highly recommended (and often required) for all teachers to learn infant and child techniques. This is because schools often host community events, and teachers may have their own children or younger siblings of students on campus.

Q: How long does the actual class take?

A: A blended learning course usually takes 1-2 hours of online work followed by a 45-minute to 1-hour in-person skills check. A full in-person class typically lasts between 3 and 5 hours, depending on the number of topics covered (CPR vs. CPR + First Aid).

Q: What happens if I perform CPR and the person doesn’t survive?

A: This is a common fear. Legally, “Good Samaritan” laws protect individuals who provide emergency assistance in good faith. From a medical standpoint, CPR significantly increases the chance of survival, but it is not a guarantee. The only “wrong” move in a cardiac arrest is doing nothing at all.

Infant CPR Classes in Washington DC: Lifesaving Skills for Your Child

Healthcare trainee holding a baby training doll during practice

TL;DR: Infant CPR Classes in Washington DC

Infant CPR training in Washington DC is essential for parents, caregivers, and professionals. To ensure you’re fully prepared and certified for DC requirements:

  • Focus on AHA BLS Certification: Choose an American Heart Association (AHA) Basic Life Support (BLS) course. This is the gold standard, universally accepted by DC employers, and covers CPR for Infants, Children, and Adults.
  • Infant CPR is Unique: Techniques for babies (under 1 year) are drastically different, requiring specific two-finger chest compressions and gentle breaths.
  • Hands-On Training is Essential: Avoid online-only courses. In-person, hands-on training is required to build muscle memory, ensure proper technique for infants, and receive a valid, accepted AHA eCard (often issued the same day).
  • Comprehensive Coverage: BLS training includes life-saving skills for all ages, plus training on AED use and choking relief.
  • Action: Get Your CPR Certification with CPR Classes Near Me for accredited, same-day certification in Washington DC.

Why Every Second Counts in the Nation’s Capital

Washington DC is a vibrant, bustling city where life moves fast, and preparedness is paramount. While we often think of emergencies as affecting adults, the moments immediately following a cardiac or breathing incident in an infant are arguably the most critical.

For new parents, grandparents, nannies, and childcare providers in the DC area, taking a certified Infant Cardiopulmonary Resuscitation (CPR) class is not merely a suggestion, it’s a fundamental responsibility.

Infants are uniquely vulnerable to sudden emergencies. These events could be caused by choking on a small toy, sudden cardiac arrest, or a respiratory issue.

The reality is that immediate, proper intervention can dramatically change the outcome for a baby. Knowing what to do in those first critical minutes, before professional help arrives, is a power you must possess.

This comprehensive guide delves into everything you need to know about securing top-tier Infant CPR certification right here in Washington DC. We focus on the importance of certified, hands-on training that adheres to the American Heart Association (AHA) standards. This ensures you walk away with the confidence and competence to protect the infants in your care.

By choosing an AHA-aligned training site, like CPR Classes Near Me, you invest in the highest quality, most recognized life-saving education available today.

Why is Infant CPR Training an Essential Skill for DC Parents and Caregivers?

The decision to enroll in an Infant CPR class is often driven by a deeply personal commitment to safety. However, for those in Washington DC, there is also a clear professional and statistical urgency behind this vital training.

First and foremost, the anatomy of an infant dictates a completely different emergency response than that used for an adult or even a child. A baby’s airway is smaller, their bone structure is more fragile, and the primary cause of cardiac arrest in infants is typically respiratory failure, not a sudden heart issue. This means the techniques used for resuscitation must be tailored precisely to their size and physical needs.

Infants face unique vulnerabilities that make CPR training essential:

  • Choking Incidents: Infants explore the world with their mouths. Small objects, pieces of food, or even thickened liquids can lead to airway obstruction quickly and silently.
  • Sudden Infant Death Syndrome (SIDS): While the exact cause is unknown, proper training equips caregivers to respond immediately if an infant stops breathing.
  • Respiratory Distress: Illnesses, allergic reactions, or congenital issues can cause breathing to stop, which rapidly leads to cardiac arrest if not addressed.

Moreover, if you are a professional working with children in the DC area, whether as a daycare operator, teacher, or licensed nanny, your certification is likely mandated by law or licensing requirements. Washington DC often requires professionals who work with children to have current CPR credentials.

By obtaining a comprehensive, AHA-approved Basic Life Support (BLS) certification, you ensure you meet all local employer and regulatory standards.

The confidence derived from high-quality, in-person training is perhaps the most critical benefit. In a true emergency, panic is the enemy of action. When you have physically practiced the steps of Infant CPR, your muscle memory takes over, allowing you to act quickly and effectively, significantly increasing a baby’s chance of survival.

What is the Difference Between Standard CPR and Infant CPR?

While the acronym CPR (Cardiopulmonary Resuscitation) applies across all age groups, the actual life-saving steps for an infant are dramatically different from those performed on an adult or a child. Understanding these distinctions is why specialized infant training is non-negotiable.

Infant CPR is specifically designed for babies from birth up to 12 months of age. The core principles remain circulation and breathing, but the execution is scaled down and modified for their delicate bodies.

Here are the key technical differences that distinguish Infant CPR:

  • Compression Method:
    • Adult & Child: Uses one or two hands placed over the center of the chest (sternum).
    • Infant: Uses two fingers (index and middle fingers) placed just below the nipple line.
  • Compression Depth:
    • Adult & Child: Approximately two inches (at least two inches for adults).
    • Infant: Approximately 1.5 inches, or about one-third the depth of the chest.
  • Rescue Breaths:
    • Adult & Child: Full breaths, ensuring the chest rises.
    • Infant: Tiny, gentle “puffs” of air (just enough to make the chest rise visibly, covering both the nose and mouth).
  • Choking Relief:
    • Adult & Child: Abdominal thrusts (Heimlich maneuver).
    • Infant: A combination of five back blows and five chest thrusts.

The most critical element to master is the compression technique. Because an infant’s heart is higher in the chest and their ribs are flexible, using too much force can cause serious injury. The two-finger method taught in certified courses ensures the correct pressure is applied to achieve circulation without causing harm.

In infant rescue, rescue breaths play an even more prominent role. Since breathing failure is the most common precursor to cardiac arrest in babies, prompt delivery of gentle breaths, combined with chest compressions, is essential for delivering oxygen to the brain and vital organs.

Only a practical, in-person class allows you to drill these techniques using age-appropriate mannequins and receive real-time feedback from an expert instructor. This hands-on, supportive learning environment, like those offered by CPR Classes Near Me in Washington DC, solidifies the muscle memory necessary for competent emergency response.

Which Certification Standard Should I Choose for Infant CPR in Washington DC?

When searching for “Infant CPR classes near me” in Washington DC, you will encounter various organizations offering certification. Choosing the right standard is crucial, especially if your certification is required for employment or if you want the assurance of the most credible, science-backed training.

In the United States, the two most recognized certification providers are the American Heart Association (AHA) and another major non-profit humanitarian organization. While both provide life-saving training, the American Heart Association (AHA) Basic Life Support (BLS) certification is universally regarded as the gold standard. This is particularly true within the healthcare community and for high-stakes professional roles.

Here is why AHA BLS is the preferred choice in DC:

  1. Science-Based Guidelines: The AHA establishes the science and guidelines for all resuscitation efforts. Their BLS curriculum is updated regularly based on the latest evidence, ensuring you learn the most effective techniques.
  2. Universal Acceptance: The AHA BLS eCard is the most widely accepted certification by employers nationwide. This includes:
    • Hospitals and medical offices.
    • Schools and educational facilities.
    • Licensed childcare and daycare facilities throughout the DMV area.
  3. Comprehensive Scope: While standard CPR courses may focus primarily on lay rescuers, the AHA BLS course is a comprehensive program covering the full spectrum of resuscitation:
    • Adult, Child, and Infant CPR and AED use.
    • Single-rescuer and team-based resuscitation skills.
    • Airway obstruction (choking) management for all ages.

By enrolling with a certified AHA training site, such as CPR Classes Near Me, you are not just getting a piece of plastic (or a digital card). You are receiving instruction that has met rigorous quality standards set by the leading authority in cardiovascular science. This commitment to excellence ensures that the Infant CPR skills you learn are accurate, current, and maximally effective.

What Types of Training Formats Are Available for DC Residents, and Which Is Best?

DC residents have a choice between three primary training formats for CPR certification: fully online, blended learning, and 100% in-person, hands-on classroom instruction. When it comes to mastering life-saving skills for an infant, the format you choose is as important as the content itself.

1. Fully Online Training (Not Recommended)

This option allows you to complete the entire course without ever physically demonstrating your skills to an instructor.

  • Pro: Offers maximum convenience; it can be completed anywhere, anytime.
  • Con: This is a crucial drawback: most DC employers do not accept online-only certifications. You cannot practice the physical skills of Infant CPR (two-finger compressions, depth, breath volume) without an instructor observing you. The certification card often lacks credibility.

2. Blended Learning (Partially Effective)

This format involves completing the lecture and cognitive portion of the course online, followed by a mandatory, short in-person skills session. During this session, you practice on a mannequin and demonstrate proficiency to an instructor.

  • Pro: Provides flexibility for learning the theory; it saves time in the classroom.
  • Con: The in-person session can feel rushed, and you may miss out on valuable discussion and instructor-led coaching that occurs during a full classroom session.

3. 100% In-Person, Hands-On Classroom (The Gold Standard)

This is the traditional, instructor-led model. You spend the entire course time with a certified professional in a dedicated learning environment, practicing on mannequins.

This is the best option for Infant CPR training because it provides:

  • Mastery of Technique: You receive constant, immediate feedback on your compression rate, depth, and hand placement, which is essential for an infant’s delicate frame.
  • Confidence Building: The hands-on practice reduces hesitation and builds the critical muscle memory needed to act under pressure.
  • Same-Day Certification: Reputable training sites, like CPR Classes Near Me in Washington DC, issue your official AHA eCard on the same day you successfully complete the training.
  • Q&A Opportunities: Direct access to an experienced instructor allows you to ask complex, real-world questions specific to your family or work environment.

For a skill as precise and critical as Infant CPR, the hands-on approach is invaluable. By selecting a dedicated, local provider that prioritizes in-person, AHA-aligned training, you ensure your skills are sharp and your certification is fully recognized by any professional standard in Washington DC.

Beyond the Baby: Does Infant CPR Training Cover Adults and Children Too?

When searching for “Infant CPR classes,” many people assume the training is only for babies. However, when you enroll in a comprehensive American Heart Association (AHA) Basic Life Support (BLS) course in Washington DC, you are acquiring a full spectrum of life-saving knowledge that covers every age group.

This is arguably one of the greatest values of selecting an AHA BLS-level course: you gain the skills to protect everyone in your home, workplace, or community.

The standard BLS curriculum is structured to teach you how to respond to cardiac and breathing emergencies for three distinct groups:

  1. Adults (Puberty and Older): You will learn the standard two-hand compression technique, adult rescue breathing, and the proper use of an Automated External Defibrillator (AED).
  2. Children (Age 1 to Puberty): You will practice adjusting techniques for a child, which involves using one hand for compressions and modifying the depth and breath volume.
  3. Infants (Under 1 Year): You will master the specialized two-finger compressions and gentle, mouth-over-nose-and-mouth rescue breaths, as discussed previously.

Beyond CPR itself, a quality certification course ensures you are proficient in two other crucial areas for all ages:

  • Automated External Defibrillator (AED) Usage: While rare for infants, knowing how to safely operate an AED and apply pediatric pads is a vital component of resuscitation for children and adults. The course teaches you how to recognize when a defibrillator is needed and how to use it safely.
  • Choking Relief: Airway obstruction is a major threat across all age groups. Your training will cover the specialized five back blow/five chest thrust technique for infants, as well as the standard abdominal thrusts for conscious and unconscious children and adults.

By committing to a comprehensive AHA BLS course offered by CPR Classes Near Me, you streamline your training. You walk away with a single, powerful certification that makes you an equipped rescuer for any potential emergency, regardless of the victim’s age. This comprehensive approach is particularly beneficial for busy DC professionals and parents who need to maximize their time while achieving the highest level of competence.

Conclusion: Gain the Confidence to Be a Lifesaver in DC

The urgency of knowing Infant CPR cannot be overstated. In an emergency, hesitation costs lives, and only high-quality, hands-on training can eliminate that hesitation and replace it with decisive, life-saving action.

For parents, caregivers, and professionals throughout Washington DC, investing in an American Heart Association-aligned BLS certification provides peace of mind and the proven skills to act when it matters most.

By choosing a local, certified training provider like CPR Classes Near Me, you benefit from expert instruction, a focused, hands-on learning environment, and the convenience of same-day certification. You will leave the course not just with an eCard, but with the confidence that you are fully prepared to provide competent and effective CPR to an infant, child, or adult. This critical skill is your most important tool for safeguarding the health and well-being of the people you love and care for in the nation’s capital.

Take the next step toward total preparedness today.

Get Your CPR Certification with CPR Classes Near Me.

FAQ Section

Q: How long does Infant CPR certification last, and when do I need to renew it?

A: Infant CPR certification, typically obtained through a comprehensive AHA BLS course, is valid for two years. It is important to renew your certification before it expires to ensure your skills remain sharp and current with the latest AHA guidelines. Renewal courses are available and typically focus on refreshing your knowledge and techniques. Regular renewal ensures you are always prepared to respond effectively in an emergency situation.

Q: Is the Infant CPR class designed only for healthcare professionals, or can lay rescuers take it?

A: While the American Heart Association’s Basic Life Support (BLS) certification is the mandatory standard for healthcare professionals (such as nurses and paramedics), it is highly recommended for lay rescuers as well, including new parents, teachers, and childcare providers. The BLS curriculum provides the most comprehensive and detailed training available, covering all age groups (Adult, Child, and Infant) to the highest standard, equipping anyone to handle a critical emergency with confidence and precision.

Q: Can I just take an online-only course to learn Infant CPR techniques?

A: You can take the theoretical portion of CPR training online, but an online-only certification is not recognized by most employers or licensing bodies in Washington DC or nationwide. To truly master the life-saving physical skills, such as the correct depth and rate of two-finger compressions for an infant and proper rescue breathing, you must complete a hands-on, in-person skills session with a certified instructor. This practical, in-person component is essential for gaining real competence, ensuring the skills are accurate, and receiving a valid, accepted AHA eCard.

Is Rescue Breathing Necessary? Modern CPR vs. Hands-Only Guide

If you’ve taken a CPR class in the last decade, you’ve likely encountered a great debate: is rescue breathing—the classic mouth-to-mouth—still necessary? It is one of the most common questions people ask when discussing modern Cardiopulmonary Resuscitation (CPR) guidelines. The rise of Hands-Only CPR has led many to believe that the vital breaths have been completely eliminated from life-saving protocols.

This is a powerful misconception.

The truth is much more nuanced than a simple “yes” or “no.” Rescue breathing has not disappeared; rather, its role has been refined and clarified based on the specific cause of the emergency and the training level of the rescuer. This shift was intentional, designed by organizations like the American Heart Association (AHA) to empower the general public to act immediately in an emergency. However, for many life-threatening situations—especially those involving children or non-cardiac arrests—rescue breathing remains absolutely essential. Understanding when to use it is key to becoming a truly prepared lifesaver.

What is the difference between Hands-Only CPR and the traditional method?

To cut through the confusion, we first need to clearly define the two main approaches to CPR in the modern era. These techniques are tailored for different situations and different levels of training.

Hands-Only CPR: The Simplest Intervention

Hands-Only CPR is the most simplified version of resuscitation. It focuses entirely on continuous, high-quality chest compressions.

  • This method is recommended for the untrained bystander who witnesses an adult suddenly collapse.
  • The goal is to push hard and fast in the center of the chest at a rate of 100 to 120 compressions per minute.
  • It eliminates the need for rescue breaths, lowering the psychological barrier that often prevents people from helping a stranger.

Standard CPR: The Comprehensive Technique

Standard CPR is the traditional, comprehensive approach required for certification.

  • This technique involves alternating cycles of chest compressions and rescue breaths at a defined ratio.
  • The current standard for a single rescuer is 30 compressions followed by 2 rescue breaths (30:2).
  • This is the skill set that all trained and certified providers—from healthcare professionals to formally trained lay rescuers—are expected to master.

The critical difference is the addition of the two breaths. Hands-Only CPR prioritizes circulation, while Standard CPR aims to provide both circulation and supplemental oxygen.

Is Rescue Breathing Necessary? Modern CPR vs. Hands-Only Guide

Why did the guidelines introduce Hands-Only CPR for adult bystanders?

The introduction of Hands-Only CPR was a landmark decision rooted in research on human behavior and cardiac physiology. The simple act of eliminating rescue breathing solved several critical problems that hampered bystander intervention.

Did fear and hesitation stop people from performing CPR?

Studies revealed that the requirement for mouth-to-mouth resuscitation was the single biggest obstacle to bystander action. People were often unwilling or hesitant to provide breaths.

  • Fear of Infection: Concerns about disease transmission, which were amplified during global health events, significantly reduced the public’s willingness to perform mouth-to-mouth on a stranger.
  • Fear of Failure: Many people worried about performing the breath technique incorrectly, worrying they might hurt the victim or fail to provide enough air.
  • Overcoming Reluctance: By removing the requirement for breathing, the guidelines provided an immediate, simple call to action: push hard and fast. This simplicity encourages intervention, which is crucial because some CPR is always better than no CPR.

Is the victim’s blood already oxygenated during a sudden collapse?

Yes, in the most common scenario for adult cardiac arrest—Sudden Cardiac Arrest (SCA)—there is typically enough oxygen stored in the blood to sustain life for a few minutes. SCA occurs when the heart’s electrical system malfunctions, causing an abrupt stop in pumping.

  • Because the person was usually breathing normally seconds before the collapse, their bloodstream remains oxygenated.
  • For the first crucial minutes, the priority is circulation, not ventilation.
  • Chest compressions are vital because they circulate this existing, oxygen-rich blood to the brain and heart until medical professionals arrive.

Does pausing compressions for rescue breaths reduce survival chances?

Every pause in chest compressions causes a dramatic drop in blood pressure and coronary perfusion pressure—the pressure that pumps blood to the heart itself.

  • Rescue breaths require the rescuer to stop compressions, even if only for a few seconds.
  • Continuous compressions maintain a more steady and effective flow of blood to the vital organs.
  • For victims of SCA in the first critical minutes, maximizing uninterrupted blood flow often outweighs the immediate benefit of supplemental breaths. Hands-Only CPR ensures the flow keeps moving.

When is rescue breathing absolutely necessary to save a life?

Despite the focus on Hands-Only CPR for bystanders, rescue breathing is still an absolutely non-negotiable component of resuscitation in numerous life-threatening situations. These scenarios fall under the category of Secondary Cardiac Arrest, where the core problem is a lack of oxygen, not an electrical failure of the heart.

Do children and infants require rescue breaths?

Yes, they do. Cardiac arrest in infants and children is overwhelmingly caused by respiratory failure—a problem with breathing—rather than a sudden, electrical heart issue like in adults.

  • Priority is Oxygen: For pediatric victims, the blood is typically oxygen-depleted before the heart stops.
  • Standard of Care: Therefore, Standard CPR (30:2 or 15:2 with two rescuers), which includes rescue breaths, is the mandatory standard of care for children and infants.
  • Hands-Only CPR is not recommended as the primary approach for pediatric victims by major guidelines.

What are the specific adult emergencies that always require rescue breathing?

Any incident where the victim has been deprived of oxygen before their heart stops requires immediate supplemental air. In these cases, simply circulating oxygen-depleted blood with compressions will not be effective long-term.

Critical adult scenarios requiring rescue breathing include:

  • Drowning Victims: Lungs are blocked with water, and the body desperately needs new oxygen.
  • Opioid Overdose: The drug suppresses the respiratory drive, causing breathing to slow and stop before the heart fails.
  • Choking Incidents: An airway blockage prevents all oxygen from entering the lungs. Rescue breaths are necessary immediately after clearing the obstruction.
  • Trauma or Smoke Inhalation: Incidents that directly compromise the airway or lungs require immediate ventilation.

In these respiratory-related emergencies, a trained individual must perform the full 30 compressions to 2 breaths cycle to effectively re-oxygenate the bloodstream.

Why are trained rescuers still required to master the full 30:2 technique?
Young man instructor helping to make first aid heart compressions with dummy during the group training indoors.

Why are trained rescuers still required to master the full 30:2 technique?

For anyone who pursues formal, certified training, such as the Basic Life Support (BLS) credential, the expectation is that they master the complete, Standard CPR technique, including rescue breaths.

Does professional training allow for better decision-making?

Yes, professional training equips a rescuer with the skills and knowledge to make a rapid, accurate assessment.

  • A certified provider is not limited to one technique; they are trained to diagnose the cause of the emergency—cardiac or respiratory—and then choose the most effective intervention.
  • If a trained person finds a victim of a suspected drug overdose, they know to prioritize the delivery of oxygen via rescue breaths.
  • They are also trained to handle multi-rescuer situations and utilize team dynamics to ensure both uninterrupted compressions and timely breaths are delivered.

Do rescue breaths matter if EMS arrival is delayed?

Scientific research suggests that the benefits of Hands-Only CPR are most pronounced in the first few minutes of Sudden Cardiac Arrest. However, if the local Emergency Medical Services (EMS) response time is prolonged (potentially beyond 10 to 14 minutes), the body’s stored oxygen will become fully depleted.

  • During prolonged resuscitation efforts, studies suggest that Standard CPR (compressions plus breaths) can lead to higher long-term survival rates compared to compression-only CPR.
  • A trained rescuer is prepared for this eventuality and can provide the necessary ventilations to sustain the patient over a longer duration.

Can trained rescuers use safety devices for rescue breathing?

A crucial component of formal certification is learning how to use barrier devices, such as a CPR face shield or a pocket mask.

  • These devices allow a trained rescuer to deliver effective rescue breaths while creating a physical separation.
  • This minimizes the risk of infection and overcomes the psychological reluctance associated with direct mouth-to-mouth contact.
  • Mastering the use of a barrier device ensures that a trained provider is never forced to choose between personal safety and providing the necessary breaths.

Conclusion: The Final Verdict on Rescue Breathing

The answer to the question, “Is rescue breathing still necessary?” is clear: Absolutely, yes, it is necessary.

The modern guidelines simply clarify who needs to perform it and when.

  • For the untrained bystander witnessing an adult collapse: Hands-Only CPR is the heroic, effective intervention that saves precious time.
  • For all pediatric victims and adult respiratory arrests: Rescue breathing is a mandatory, life-saving skill that must be performed.
  • For the certified provider: Standard CPR (30:2) remains the gold standard, equipping you to handle every type of arrest scenario with confidence and competence.

Do not allow the public promotion of Hands-Only CPR to create a gap in your own knowledge. Being able to provide rescue breaths is not an outdated skill; it is a critical differentiator that allows you to save a child, a drowning victim, or someone suffering from an overdose. Your willingness to learn and use this full skillset makes you an indispensable link in the chain of survival.

Ready to master the full scope of life-saving skills?

Contact CPR Classes Near Me today to register for an American Heart Association certified BLS CPR and First Aid course and ensure you are prepared for every emergency scenario.

Modern CPR: Frequently Asked Questions (FAQ)

What is the primary reason the American Heart Association recommends Hands-Only CPR for untrained bystanders?

The primary reason is to overcome the psychological barriers that cause people to hesitate or refuse to help. Studies showed that the need for mouth-to-mouth resuscitation was the biggest deterrent to bystander action. By recommending the simple action of continuous chest compressions (Hands-Only CPR), the AHA encourages immediate intervention. This is crucial because for an adult who suffers a sudden cardiac arrest, the most important action in the first few minutes is to circulate the oxygen-rich blood that is already in their system.

If I am trained, should I always perform the 30 compressions to 2 breaths ratio?

If you are fully trained and certified, the 30 compressions to 2 breaths (30:2) ratio is the standard technique you should be prepared to use. However, you should tailor your response based on the situation and your professional judgment. If you are alone and the victim is an adult who collapsed suddenly, you may choose to begin with continuous compressions to minimize interruption, especially if you do not have a barrier device. If the victim is a child or the cause of the arrest is respiratory (like drowning), you must use the full 30:2 ratio immediately. The key is that you possess the skill for both.

Does the victim need rescue breathing immediately if the cardiac arrest was caused by an opioid overdose?

Yes, if the cardiac arrest is caused by an opioid overdose, the victim needs rescue breathing immediately. Opioids cause breathing to slow down and then stop before the heart fails, meaning the person’s blood is already severely oxygen-depleted. In this scenario, simply circulating deoxygenated blood with compressions is far less effective. A trained rescuer should initiate the full 30:2 cycle of compressions and breaths to deliver vital oxygen to the body.

How long is the CPR certification valid, and can I renew it?

The standard CPR certification card, such as the American Heart Association BLS certification, is valid for two years. Yes, you absolutely can and should renew it. Most training organizations offer renewal courses that are equivalent to the initial course but are designed to refresh your knowledge and skills, ensuring you remain current with the latest life-saving guidelines and techniques.

Why is there a different compression-to-breath ratio for children with two rescuers?

When two trained rescuers are performing CPR on an infant or child, the compression-to-breath ratio is typically 15 compressions followed by 2 breaths (15:2). This lower compression-to-breath ratio is used because pediatric cardiac arrest is usually due to a lack of oxygen (respiratory failure). The 15:2 ratio prioritizes the delivery of more frequent ventilations to the child or infant, which is necessary to re-oxygenate their blood, while still ensuring blood flow is maintained by the chest compressions.

Understanding Choking Hazards and Infant CPR Techniques

Giving CPR to an Infant

Understanding Choking Hazards and Infant CPR Techniques

Giving CPR to an Infant

Ensuring the safety and well-being of infants is a paramount concern for every parent and caregiver. The infant stage is a critical period of development where babies are naturally curious and eager to explore their surroundings, often using their mouths as a primary tool for discovery. This innate curiosity, while essential for learning, also exposes them to numerous risks, including choking hazards. Understanding these hazards and knowing how to perform CPR on an infant can make a life-saving difference, allowing caregivers to act swiftly and confidently in critical moments.

In this comprehensive guide, we will delve into the common choking hazards that threaten babies and provide clear, step-by-step guidance on how to perform CPR on an infant. By equipping yourself with this knowledge, you can ensure a safer environment for your child and be prepared to act decisively in emergencies, thereby enhancing your peace of mind and safeguarding the infant’s well-being.

Common Choking Hazards for Infants

Choking is a leading cause of injury and death among children, especially infants who are naturally curious and tend to explore their world by putting objects in their mouths. This behavior is part of their developmental process but can lead to dangerous situations if not carefully monitored. Here are some common choking hazards:

Food Items

Small, round, or hard foods can easily become lodged in a baby’s throat, posing significant risks. Some of the most common food choking hazards include:

  • Grapes and Cherry Tomatoes: These foods are not only the perfect size to block a small airway but also have a smooth, slippery surface that makes them difficult to dislodge once stuck. It is crucial to cut these items into quarters before serving to an infant.
  • Nuts and Seeds: Due to their small size and hard texture, these should be avoided until the child is older and more capable of safely handling them. Nuts and seeds can easily become a choking hazard due to their tendency to break into smaller pieces.
  • Popcorn: The irregular shape and lightweight nature of popcorn make it easy for an infant to inhale, leading to a potential blockage of the airway. It’s best to refrain from giving popcorn to infants and toddlers.
  • Hard Candies and Gum: These items should be strictly avoided for infants and young children due to their potential to stick to the throat or teeth, increasing the risk of choking.

Understanding Choking Hazards and Infant CPR Techniques

Household Objects

Beyond food, many everyday items can pose a choking risk to infants. These objects are often overlooked but can be just as dangerous:

  • Small Toys and Parts: Toys with small parts are a common source of choking hazards. Always check the age recommendations on toys and ensure they are appropriate for your child’s developmental stage. Be vigilant about toys with detachable parts.
  • Coins and Batteries: These are particularly dangerous due to their size and shape. Additionally, batteries pose a chemical hazard if ingested, making it crucial to keep them out of reach.
  • Buttons and Beads: These small objects are often found in household sewing kits or craft supplies. They can be easily swallowed, so it is important to keep them stored securely away from infants.

Tips for Preventing Choking

Prevention is key when it comes to choking hazards. By taking proactive measures, you can significantly reduce the risk of choking incidents. Here are some tips to keep your baby safe:

  • Always supervise your child during meals and playtime: Never leave an infant unattended while they are eating or playing with toys, as this is when they are most likely to put objects in their mouth.
  • Ensure toys are appropriate for your child’s age: Check for any small parts that can come loose, and regularly inspect toys for wear and tear that might create choking hazards.
  • Keep small objects out of reach: This includes not only household items but also items that older children might accidentally leave within an infant’s grasp. Educate older siblings about the dangers of leaving such items around.
  • Educate older siblings about the dangers of choking hazards: Encourage them to be mindful and assist in keeping the environment safe for younger children. Teaching them the importance of safety can foster a responsible attitude.

How to Recognize Choking in Infants

Recognizing the signs of choking is crucial to responding effectively. An infant who is choking may display several visible and audible signs that demand immediate attention. Here is what you should look for:

  • Be unable to cry or make noise: Silence during what should be audible distress is a clear indication that the airway might be blocked.
  • Have difficulty breathing or noisy breathing: Listen for wheezing or high-pitched sounds, as these can indicate that something is obstructing the airway.
  • Show a bluish tint around the lips and face: A lack of oxygen can cause a noticeable change in skin color, particularly around the lips, fingers, and face.
  • Exhibit coughing or gagging: While coughing can be a sign that the body is attempting to clear the obstruction, ineffective coughing or gagging that does not resolve quickly requires immediate action.

If you suspect your child is choking and they are unable to cough effectively, it’s time to act quickly. Swift intervention can prevent severe outcomes and save your child’s life.

Infant CPR Techniques

Infant CPR Techniques

Infant CPR (Cardiopulmonary Resuscitation) is a life-saving technique used in emergencies when a baby is not breathing or their heart has stopped beating. Understanding and practicing these techniques can help you remain calm and effective in a crisis. Here’s a step-by-step guide to performing CPR on an infant:

Step 1: Check Responsiveness

Gently tap the infant’s foot and call their name to see if they respond. This initial check helps determine the level of consciousness and the need for further action. If there is no response, shout for help and have someone call emergency services while you begin CPR, as time is of the essence in such situations.

Step 2: Position the Infant

Lay the baby on their back on a firm, flat surface. This positioning ensures you can perform chest compressions effectively. Keep their head in a neutral position to ensure an open airway, as tilting the head too far back or forward may cause additional obstruction.

Step 3: Perform Chest Compressions

  • Place two fingers in the center of the infant’s chest, just below the nipple line: The placement of your fingers is crucial for effective compressions.
  • Press down hard and fast, about 1.5 inches deep, at a rate of 100-120 compressions per minute: Maintaining the correct depth and pace is vital to mimic the heart’s natural rhythm.
  • Allow the chest to fully recoil between compressions: This ensures the heart can refill with blood, maximizing the effectiveness of the compressions.

Step 4: Open the Airway

Tilt the infant’s head back slightly and lift the chin to open the airway. Be careful not to tilt the head too far back, as this could cause further obstruction rather than relief. This step is critical for ensuring that rescue breaths are effective.

Step 5: Give Rescue Breaths

  • Cover the infant’s nose and mouth with your mouth, creating an airtight seal: This ensures that the breaths you provide are directed into the lungs.
  • Gently blow into the infant’s mouth until you see the chest rise: Give two breaths, each lasting about one second. Watching for chest rise confirms that air is entering the lungs.

Step 6: Continue CPR

Continue the cycle of 30 chest compressions followed by 2 rescue breaths until help arrives or the infant shows signs of life. It’s essential to maintain focus and rhythm throughout this process to maximize its effectiveness.

Practice and Preparedness

While we hope you never have to use these skills, being prepared can make all the difference. Readiness involves not only understanding the techniques but also being equipped to act without hesitation. Here are some ways to ensure you’re ready in case of an emergency:

  • Take a CPR Class: Attending a certified CPR course will provide hands-on practice and the confidence to act in an emergency. These classes often simulate real-life scenarios, allowing you to practice your responses.
  • Keep Emergency Numbers Handy: Have a list of emergency contacts, including your pediatrician and local emergency services, easily accessible. Quick access to these numbers can save precious time.
  • Educate Family Members and Caregivers: Ensure everyone who cares for your child knows CPR techniques and choking hazard prevention. Sharing this knowledge strengthens your support network and ensures that more people are prepared to help if needed.

Conclusion

Understanding choking hazards and knowing how to perform infant CPR are essential skills for parents and caregivers. By taking proactive steps to prevent choking and learning CPR techniques, you can help ensure the safety and well-being of your infant. These skills are not just beneficial; they are crucial in ensuring that you can act quickly and effectively in an emergency.

Remember, preparedness is key, and taking the time to learn these vital skills can make all the difference in protecting the ones you love. Stay informed, stay prepared, and keep your little one safe. By prioritizing education and readiness, you create a secure environment where your child can explore and grow with confidence.

Contact CPR Classes Near Me for Essential CPR and First Aid Training

Don’t wait until an emergency happens! Equip yourself with the life-saving skills needed to protect your infant. Contact CPR Classes Near Me today to enroll in comprehensive CPR and First Aid training. These classes will provide you with hands-on experience and the confidence to act swiftly in critical situations.

Ensure the safety of your child and those around you—reach out now to find a class that fits your schedule!

AHA BLS CPR & AED Classes

Starting at $59.95
American Heart Association BLS CPR & AED Certification 
Our CPR Trainers are American Heart Association Certified. We teach the best CPR Classes and deliver your certification eCard the same day. Get your AHA BLS CPR Certification and save now!

FAQ

Our primary goal is to ensure that you receive a top-quality CPR/First Aid certification. With our in-person training in Austin, you can learn CPR and BLS in just one class. Your presence is all that’s needed to continue with your lesson! During your session, you will complete all the live-training components necessary to ensure you receive your AHA Healthcare Provider certification card.

Our CPR Classes in Austin are discounted to $59.95 (saving you $20), and our CPR + First Aid Class is offered at $79.95 (also saving you $20). When looking for CPR Classes, ensure to check for the American Heart Association seal. Other sites might seem cheaper but frequently lack the official training credentials demanded by employers.

Upon successful completion of the course, you will obtain a CPR certification that is valid for two years. The AHA CPR certification is recognized with the highest acceptance rate among employers nationwide.

Indeed! Enroll in any CPR Certification Austin BLS course to extend your certification for an additional two years. The in-person BLS course and the Renewal Class are identical.

Anyone capable of completing the course independently should consider pursuing CPR training and CPR Certification. There is no minimum age restriction for obtaining a CPR certification in Austin through the American Heart Association (AHA)..

CPR training needs to be carried out in person to guarantee its effectiveness. Our experienced instructors offer an engaging and dynamic learning experience. Typically, employers do not recognize CPR certifications that are obtained solely through online courses.

All authorized American Heart Association training centers are obligated to display the entire video. After a three-hour session with CPR Classes Near Me Austin, your BLS CPR eCard will be promptly issued by the instructor on the same day!