CPR/AED vs BLS: What Is the Difference? Which One Do You Need?
When it’s time to get certified in life-saving skills, you’ll likely run into two main options: CPR/AED and BLS. On the surface, they seem identical. Both involve chest compressions, both teach you how to use a defibrillator, and both save lives.
However, picking the wrong one could mean your employer won’t accept your certificate, or worse, you won’t be trained for the specific environment where you work. Whether you are a fitness instructor in Austin or a nurse at a local hospital, understanding the “why” and “how” behind these certifications is essential for professional compliance and public safety.
What exactly is the difference between CPR/AED and BLS?
The primary difference lies in the target audience and the depth of training.
CPR/AED (Cardiopulmonary Resuscitation & Automated External Defibrillator) is designed for “laypeople”—the general public. It focuses on the basic skills needed to keep someone alive until professional help arrives. It is perfect for people who might encounter an emergency at a grocery store, a gym, or a school.
BLS (Basic Life Support) is a higher-level certification specifically designed for healthcare providers and public safety professionals. It includes everything in a standard CPR course but adds advanced techniques. BLS training assumes you will be working in a team environment (like a hospital or an ambulance) and using professional-grade equipment.
Is BLS more difficult than a standard CPR course?
While “difficult” is subjective, BLS is certainly more comprehensive. In a standard CPR/AED class, you learn how to act as a lone rescuer. In a BLS class, you are trained to work as part of a high-performance team.
Key skill additions in BLS include:
- Bag-Valve Mask (BVM) Ventilation: Learning to use a manual resuscitator rather than just mouth-to-mouth or a simple pocket mask.
- Two-Rescuer Scenarios: Coordinating with a partner to switch roles every two minutes to prevent fatigue.
- Pulse Checks: BLS students are trained to check for a pulse for no more than 10 seconds, a skill not typically emphasized in layperson classes.
- Advanced Airway Support: How to provide breaths when an advanced airway (like an endotracheal tube) is in place.
Who should choose a CPR/AED certification?
If your job is not in the medical field, CPR/AED is usually the right choice. This certification meets the requirements for OSHA-mandated workplace safety.
You should choose CPR/AED if you are:
- A Teacher or Coach: Most school districts and athletic departments require this level of training.
- A Fitness Instructor: Gyms and yoga studios need you to know how to use an AED and perform compressions.
- A Construction Worker: Many job sites require basic safety certifications.
- A Parent or Caregiver: If you simply want to be prepared to protect your family, this course provides the essential skills without the medical jargon.
- A Security Guard: Most security roles only require layperson-level training.
Who is required to have a BLS certification?
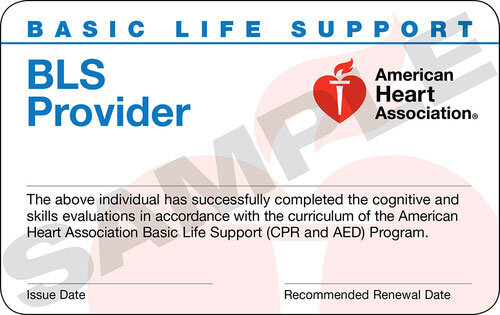
If you work in a clinical setting or are a student in a medical program, you almost certainly need BLS. Most healthcare employers will not accept a “Heartsaver” or “CPR/AED” card; they specifically look for “BLS Provider.”
You need BLS if you are:
- A Nurse or Doctor: Hospitals require BLS as a baseline for all clinical staff.
- A Dentist or Dental Hygienist: Most state boards require BLS for dental licensure.
- An EMT or Paramedic: First responders must be experts in team-based resuscitation.
- A Physical Therapist: Even in outpatient clinics, BLS is the standard.
- A Medical Student: Most clinical rotations require a current BLS card before you can step onto the floor.
Do the skills taught in CPR/AED and BLS overlap?
Yes, there is significant overlap. Both courses are built on the same American Heart Association (AHA) guidelines. Regardless of which class you take, you will master the “Chain of Survival.”
Common skills in both courses include:
- Recognizing the signs of cardiac arrest.
- Performing high-quality chest compressions (depth and rate).
- Safe and effective use of an AED.
- Relief of choking (foreign body airway obstruction) for adults and infants.
- Providing rescue breaths.
The difference isn’t the quality of the compressions; it’s the context in which those compressions are delivered and the equipment used to facilitate breathing.
Which certification does the American Heart Association (AHA) recommend?
The AHA doesn’t necessarily recommend one over the other for everyone; rather, they provide different “tracks” based on your role.
- The Heartsaver Track: This includes CPR/AED and First Aid. It is written in simple, non-medical language. It is designed to be accessible to anyone regardless of their educational background.
- The BLS Provider Track: This is written for the medical professional. It uses clinical terminology and focuses on patient outcomes in a professional setting.
In Austin and throughout Texas, most professional organizations follow AHA standards. Ensuring you have an AHA-approved card is often more important than the title of the course itself, as many “online-only” certifications are not recognized by employers or regulatory boards.
How long do these certifications last?
Both CPR/AED and BLS certifications are valid for two years. After 24 months, you must take a renewal or “update” course to maintain your credentials.
Staying current is vital because:
- Skills Fade: Research shows that CPR skills begin to decline just a few months after training.
- Updated Guidelines: The AHA updates its science every few years. A renewal class ensures you are using the most effective techniques.
- Legal Compliance: Most employers require an active card to stay on the schedule.
Can you take a BLS class if you aren’t a healthcare provider?
Absolutely! While BLS is designed for healthcare professionals, anyone can take the course. If you are a “super-user” who wants the most in-depth training available, BLS is a great option. It provides a more technical look at the mechanics of the heart and the science of resuscitation.
However, be prepared for a faster-paced environment and a written exam that assumes a basic understanding of medical concepts. If you aren’t comfortable with technical terminology, the standard CPR/AED class is much more approachable.
How do I find a class near me?
Finding the right class in your local area is easy. You should look for a training center that offers both options so you can be sure you’re getting the right level of training for your career path.
When searching for a class:
- Check the Provider: Ensure they are an authorized AHA or Red Cross training site.
- Look for Blended Learning: Many centers offer “HeartCode” or “Simulation Learning,” which allows you to do the book work online and come in person only for the skills check.
- Verify the Card: Make sure you will receive your eCard the same day so you can provide proof to your employer immediately.
What are the key technical differences in the training?
When you sit down for a BLS class versus a CPR/AED class, you will notice distinct differences in the curriculum.
In a CPR/AED class:
- You focus on 1-person CPR.
- You use a simple barrier device for breaths.
- You are taught to look for “signs of life” or breathing.
In a BLS class:
- You focus on 1-person and 2-person CPR.
- You use a Bag-Valve Mask (BVM) which requires two hands to seal correctly.
- You are taught to check a carotid pulse for at least 5 but no more than 10 seconds.
- You learn the “team lead” concept to manage a cardiac arrest scene.
Conclusion
Choosing between CPR/AED and BLS doesn’t have to be complicated. If you are a medical professional or student, go with BLS. If you are a teacher, coach, or concerned citizen, CPR/AED is your best bet. Both paths empower you with the confidence to act when a life is on the line.
Regardless of the acronym on your card, the most important thing is that you are trained and ready. Every minute counts in a cardiac emergency, and your training could be the difference between a life lost and a life saved.
Ready to get certified?
Whether you need a layperson CPR/AED card or a professional BLS Provider certification, we’ve got you covered with expert instructors and flexible schedules. Contact CPR Classes Near Me today to find a session that fits your schedule and career needs!
Frequently Asked Questions (FAQ)
Q: If I have a BLS card, do I also need a CPR/AED card?
No. BLS is a higher level of certification that encompasses all the skills taught in a standard CPR/AED course. If you are BLS certified, you are over-qualified for roles that only require CPR/AED and your card will be accepted.
Q: Does BLS include First Aid?
Not usually. BLS focuses strictly on cardiovascular and respiratory emergencies in a clinical context. Most healthcare providers take First Aid as a separate course if required by their specific job, whereas many “Heartsaver” courses bundle CPR/AED and First Aid together for convenience.
Q: Can I get my BLS certification entirely online?
No. While you can do the “cognitive” (lecture) portion online via an AHA-approved portal, you must attend an in-person skills practice and testing session with a certified instructor to receive a valid BLS Provider card. Employers will generally not accept “online-only” cards without a hands-on component.
Q: What happens if my certification expires?
If your card expires, you are technically no longer certified. Most training centers require you to take the full “Initial” course rather than a shorter “Renewal” course if your card is even one day past its expiration date. It is always better to renew 30 days before the expiration.
Q: Is there an age limit for BLS or CPR classes?
There is no formal age limit set by the American Heart Association. As long as a student can physically perform the compressions to the required depth and pass the skills test, they can be certified. Most instructors find that children around age 10-12 are physically capable of meeting the requirements.