preloader

CPR Techniques for Different Age Groups: Be Prepared to Save a Life

CPR Techniques for Different Age Groups

Knowing CPR (Cardiopulmonary Resuscitation) is a valuable skill that can mean the difference between life and death. Early intervention with CPR can significantly increase the chances of survival for someone experiencing cardiac arrest. However, CPR techniques vary depending on the age of the person needing help. This article will provide a comprehensive guide to CPR Techniques for Different Age Groups, empowering you to act effectively in an emergency.

Why Are There Different CPR Techniques for Different Age Groups?

An adult body has a different physiology than a child’s body, and an infant’s body is even more delicate. The size and fragility of bones, the depth of the chest cavity, and the appropriate compression force all differ significantly across age groups. Using the wrong technique could be ineffective or even cause injuries.

Here’s a breakdown of the key considerations for CPR techniques by age group:

  • Adults (Puberty and Older): Adults require the most forceful compressions as their chest cavity is deeper. Techniques involve using the heel of one or both hands for chest compressions.
  • Children (1 year to Puberty): Children require less forceful compressions than adults due to their smaller chest size. Techniques may involve using one or two hands depending on the child’s size.

Infants (Newborn to 1 year): Infants require the gentlest approach with minimal pressure. Techniques involve using only two fingers for chest compressions on the center of the chest.

CPR Techniques for Adults

Here’s a step-by-step guide to performing CPR on Adults:

  1. Scene Safety: Before approaching the victim, ensure your safety and the safety of others. Check for any dangers like electrical hazards or traffic.
  2. Check for Responsiveness: Gently shake the victim’s shoulders and ask loudly, “Are you okay?” If they don’t respond, call for emergency services immediately (dial 911 in the US) or ask someone else to do so.
  3. Position the Victim: Lay the victim flat on their back on a firm surface.
  4. Open the Airway: Tilt the head back slightly and lift the chin to open the airway.
  5. Check for Breathing: Look, listen, and feel for normal breathing for no more than 10 seconds. If they are not breathing normally, begin CPR.
  6. Chest Compressions: Locate the center of the chest, which is the lower half of the breastbone. Place the heel of your dominant hand on the center of the chest and your other hand on top, interlocking your fingers. Position yourself directly over the chest and use your body weight (not just your arms) to push down firmly and evenly on the chest by about 2 inches (5 cm). Aim for a rate of 100-120 compressions per minute.
  7. Rescue Breaths: After every 30 chest compressions, pinch the victim’s nose closed with your thumb and index finger. Create a seal with your mouth over their mouth and blow one breath for about 1 second, watching for the chest to rise.
  8. Continue CPR: Continue cycles of 30 chest compressions to 2 rescue breaths until help arrives, the victim starts breathing normally, or you become exhausted.

Additional Tips for Adult CPR:

  • Maintain a steady and consistent rhythm during chest compressions.
  • Avoid pausing for too long between compressions and breaths.
  • If you are uncomfortable performing rescue breaths, continue with chest compressions only.
  • An Automated External Defibrillator (AED) can be used if available. Follow the voice prompts on the AED.

CPR Techniques for Children

Scene Safety: As with adults, ensure your safety and the safety of others before approaching the child. Look for any immediate dangers like electrical hazards, traffic, or drowning hazards (if near water). If the scene is unsafe, remove the child from danger if possible without putting yourself at risk.

Check for Responsiveness: Gently tap the child’s shoulder and ask loudly, “Are you okay?” in a clear and firm voice. If the child doesn’t respond or show any signs of movement, shout for help from bystanders and call emergency services immediately.

Position the Victim: Lay the child flat on their back on a firm, stable surface. If the child is on a soft surface like a couch, carefully move them to a firmer surface suitable for CPR.

Open the Airway: Use the head-tilt chin-lift maneuver specifically adapted for children. Tilt the head back slightly by placing one hand on the forehead and gently applying pressure. With your other hand, lift the chin by placing two fingers under the bony part of the lower jaw and lifting it slightly. Avoid tilting the head back too far, as this can block the airway.

Check for Breathing: Look, listen, and feel for normal breathing for no more than 10 seconds. Look for chest movement, listen for breaths, and feel for air coming out of the nose or mouth. If the child is not breathing normally (gasping, shallow breaths, or no breaths at all), begin CPR.

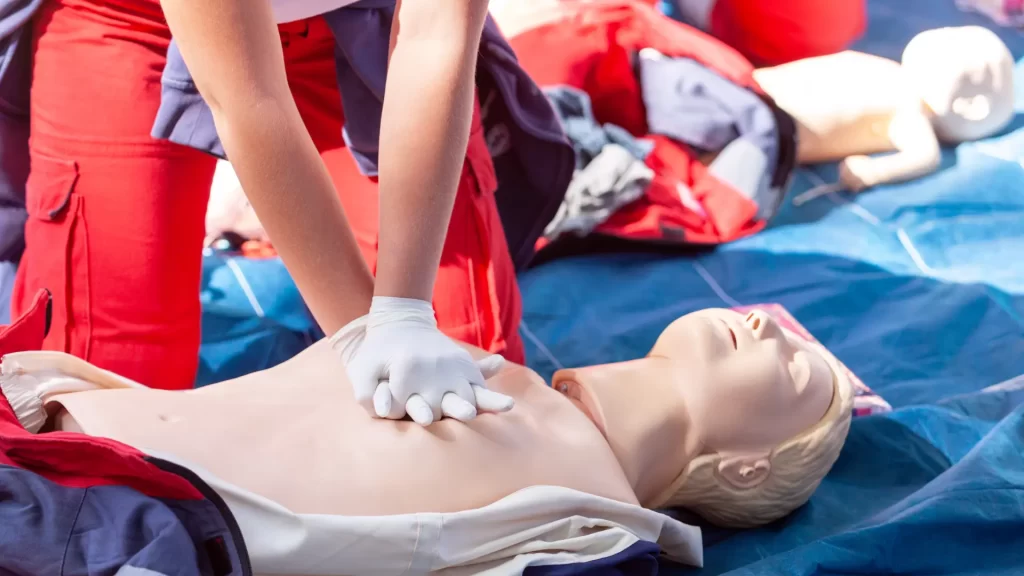
Chest Compressions for Children: Locate the center of the chest, which is the lower half of the breastbone. The placement of hands for chest compressions depends on the child’s size:

  • One-Handed Compressions (Smaller Children): If the child is smaller and your hand can comfortably encircle half of the chest, use the heel of one hand placed in the center of the breastbone.
  • Two-Handed Compressions (Larger Children): For larger children, use two hands. Place the heel of your dominant hand on the lower half of the breastbone, with the other hand on top, fingers interlocking across the child’s back.

Push down firmly and evenly by about 2 inches (5 cm) at a rate of 100-120 compressions per minute.  Imagine pushing down about one-third of the depth of the chest cavity. Use your body weight to deliver effective compressions, but avoid bouncing on the chest. After each compression, allow the chest to rise completely before pushing down again.

Rescue Breaths for Children:

  1. Pinch the child’s nose closed with your thumb and index finger.
  2. Create a seal with your mouth over the child’s mouth, ensuring a good fit.
  3. Blow one small breath for about 1 second, just enough to see the chest rise. Avoid blowing too hard, as this can overinflate the lungs.
  4. Allow the chest to fall completely between breaths before delivering the next breath.

Continue CPR for Children: Continue cycles of 30 chest compressions to 2 rescue breaths until help arrives, the child starts breathing normally again, or you become exhausted. Ideally, continue CPR until professional medical help takes over.

CPR Techniques for Infants

CPR for infants requires the most delicate approach due to their extremely fragile bodies. Here’s a step-by-step guide:

  1. Scene Safety: As always, ensure your safety and the safety of others.
  2. Check for Responsiveness: Gently tap the infant’s foot and ask loudly, “Are you okay?” If they don’t respond, call for emergency services immediately.
  3. Position the Infant: Lay the infant flat on their back on a firm surface.
  4. Open the Airway: Use a two-finger technique to open the airway. Place two fingers on the bony part just below the infant’s nose and gently tilt the head back while lifting the chin slightly.
  5. Check for Breathing: Look, listen, and feel for normal breathing for no more than 10 seconds. If they are not breathing normally, begin CPR.
  6. Chest Compressions for Infants: Locate the center of the chest, which is the area just below the nipple line. Use two fingers (thumb and index finger) placed in the center of the chest to deliver compressions.
  7. Push down firmly and evenly by about 1 to 1.5 inches (2.5 to 4 cm) aiming for a rate of 120 compressions per minute.
  8. Rescue Breaths for Infants: Pinch the infant’s nose closed with your thumb and index finger. Create a seal with your mouth over both the infant’s mouth and nose and blow one very small breath for about 1 second, just enough to see the chest rise.
  9. Continue CPR for Infants: Continue cycles of 30 chest compressions to 2 rescue breaths until help arrives, the infant starts breathing normally, or you become exhausted.

Additional Tips for Infant CPR:

  • Be extremely gentle with the infant’s chest.
  • The depth of chest compressions should be about one-third of the chest’s anteroposterior (front-to-back) diameter.
  • If you are uncomfortable performing rescue breaths, continue with chest compressions only.
  • An AED is not typically used for infants. However, if an AED is readily available, follow the voice prompts.
  •  

Find the Best CPR Training Classes in Phoenix

In an emergency situation where someone experiences cardiac arrest, immediate CPR intervention can significantly increase their chances of survival. But with so many CPR training options available in Phoenix, how do you find the best class for you?

Here’s what to look for when choosing a CPR training class in Phoenix:

  • Experienced Instructors: Seek instructors certified by reputable organizations like the American Heart Association (AHA) or the American Red Cross. Experienced instructors ensure you receive the most up-to-date CPR techniques and can effectively guide you through the hands-on practice sessions.
  • Flexible Class Schedules: Busy schedules shouldn’t prevent you from learning CPR. Look for training providers offering classes at various times and days to accommodate your needs.
  • Convenient Locations: Choose a class location that’s easily accessible for you, minimizing travel time and maximizing convenience.
  • Comprehensive Training: Ensure the class covers CPR techniques for all age groups, including adults, children, and infants. Ideally, the class should also include Automated External Defibrillator (AED) training, which can be crucial in certain emergencies.
  • Hands-on Practice: Effective CPR requires muscle memory developed through practice. Look for classes that dedicate significant time to hands-on practice sessions on mannequins, allowing you to refine your skills and build confidence.
  • Certification: Upon successful completion of the CPR class, you should receive a valid CPR certification card from a recognized organization. This certification demonstrates your competence and may be required for certain jobs or volunteer positions.

Conclusion

CPR is a lifesaving skill that everyone should consider learning. By understanding the CPR Techniques for Different Age Groups, you can be prepared to act effectively in an emergency situation. Remember, early intervention with CPR can significantly increase the chances of survival for someone experiencing cardiac arrest.