Understanding Choking Hazards and Infant CPR Techniques

Giving CPR to an Infant

Ensuring the safety and well-being of infants is a paramount concern for every parent and caregiver. The infant stage is a critical period of development where babies are naturally curious and eager to explore their surroundings, often using their mouths as a primary tool for discovery. This innate curiosity, while essential for learning, also exposes them to numerous risks, including choking hazards. Understanding these hazards and knowing how to perform CPR on an infant can make a life-saving difference, allowing caregivers to act swiftly and confidently in critical moments.

In this comprehensive guide, we will delve into the common choking hazards that threaten babies and provide clear, step-by-step guidance on how to perform CPR on an infant. By equipping yourself with this knowledge, you can ensure a safer environment for your child and be prepared to act decisively in emergencies, thereby enhancing your peace of mind and safeguarding the infant’s well-being.

Common Choking Hazards for Infants

Choking is a leading cause of injury and death among children, especially infants who are naturally curious and tend to explore their world by putting objects in their mouths. This behavior is part of their developmental process but can lead to dangerous situations if not carefully monitored. Here are some common choking hazards:

Food Items

Small, round, or hard foods can easily become lodged in a baby’s throat, posing significant risks. Some of the most common food choking hazards include:

  • Grapes and Cherry Tomatoes: These foods are not only the perfect size to block a small airway but also have a smooth, slippery surface that makes them difficult to dislodge once stuck. It is crucial to cut these items into quarters before serving to an infant.
  • Nuts and Seeds: Due to their small size and hard texture, these should be avoided until the child is older and more capable of safely handling them. Nuts and seeds can easily become a choking hazard due to their tendency to break into smaller pieces.
  • Popcorn: The irregular shape and lightweight nature of popcorn make it easy for an infant to inhale, leading to a potential blockage of the airway. It’s best to refrain from giving popcorn to infants and toddlers.
  • Hard Candies and Gum: These items should be strictly avoided for infants and young children due to their potential to stick to the throat or teeth, increasing the risk of choking.

Understanding Choking Hazards and Infant CPR Techniques

Household Objects

Beyond food, many everyday items can pose a choking risk to infants. These objects are often overlooked but can be just as dangerous:

  • Small Toys and Parts: Toys with small parts are a common source of choking hazards. Always check the age recommendations on toys and ensure they are appropriate for your child’s developmental stage. Be vigilant about toys with detachable parts.
  • Coins and Batteries: These are particularly dangerous due to their size and shape. Additionally, batteries pose a chemical hazard if ingested, making it crucial to keep them out of reach.
  • Buttons and Beads: These small objects are often found in household sewing kits or craft supplies. They can be easily swallowed, so it is important to keep them stored securely away from infants.

Tips for Preventing Choking

Prevention is key when it comes to choking hazards. By taking proactive measures, you can significantly reduce the risk of choking incidents. Here are some tips to keep your baby safe:

  • Always supervise your child during meals and playtime: Never leave an infant unattended while they are eating or playing with toys, as this is when they are most likely to put objects in their mouth.
  • Ensure toys are appropriate for your child’s age: Check for any small parts that can come loose, and regularly inspect toys for wear and tear that might create choking hazards.
  • Keep small objects out of reach: This includes not only household items but also items that older children might accidentally leave within an infant’s grasp. Educate older siblings about the dangers of leaving such items around.
  • Educate older siblings about the dangers of choking hazards: Encourage them to be mindful and assist in keeping the environment safe for younger children. Teaching them the importance of safety can foster a responsible attitude.

How to Recognize Choking in Infants

Recognizing the signs of choking is crucial to responding effectively. An infant who is choking may display several visible and audible signs that demand immediate attention. Here is what you should look for:

  • Be unable to cry or make noise: Silence during what should be audible distress is a clear indication that the airway might be blocked.
  • Have difficulty breathing or noisy breathing: Listen for wheezing or high-pitched sounds, as these can indicate that something is obstructing the airway.
  • Show a bluish tint around the lips and face: A lack of oxygen can cause a noticeable change in skin color, particularly around the lips, fingers, and face.
  • Exhibit coughing or gagging: While coughing can be a sign that the body is attempting to clear the obstruction, ineffective coughing or gagging that does not resolve quickly requires immediate action.

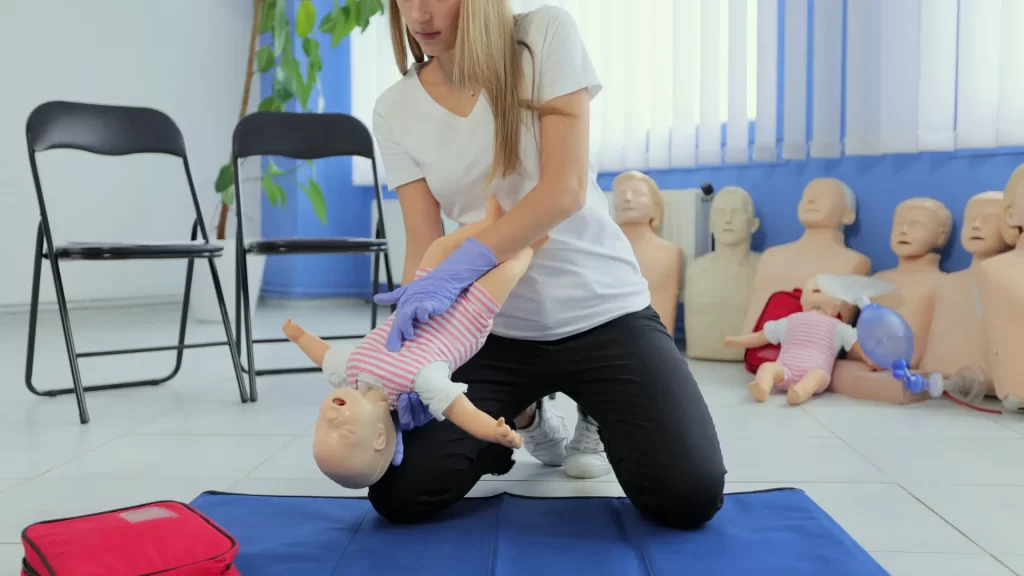
If you suspect your child is choking and they are unable to cough effectively, it’s time to act quickly. Swift intervention can prevent severe outcomes and save your child’s life.

Infant CPR Techniques

Infant CPR Techniques

Infant CPR (Cardiopulmonary Resuscitation) is a life-saving technique used in emergencies when a baby is not breathing or their heart has stopped beating. Understanding and practicing these techniques can help you remain calm and effective in a crisis. Here’s a step-by-step guide to performing CPR on an infant:

Step 1: Check Responsiveness

Gently tap the infant’s foot and call their name to see if they respond. This initial check helps determine the level of consciousness and the need for further action. If there is no response, shout for help and have someone call emergency services while you begin CPR, as time is of the essence in such situations.

Step 2: Position the Infant

Lay the baby on their back on a firm, flat surface. This positioning ensures you can perform chest compressions effectively. Keep their head in a neutral position to ensure an open airway, as tilting the head too far back or forward may cause additional obstruction.

Step 3: Perform Chest Compressions

  • Place two fingers in the center of the infant’s chest, just below the nipple line: The placement of your fingers is crucial for effective compressions.
  • Press down hard and fast, about 1.5 inches deep, at a rate of 100-120 compressions per minute: Maintaining the correct depth and pace is vital to mimic the heart’s natural rhythm.
  • Allow the chest to fully recoil between compressions: This ensures the heart can refill with blood, maximizing the effectiveness of the compressions.

Step 4: Open the Airway

Tilt the infant’s head back slightly and lift the chin to open the airway. Be careful not to tilt the head too far back, as this could cause further obstruction rather than relief. This step is critical for ensuring that rescue breaths are effective.

Step 5: Give Rescue Breaths

  • Cover the infant’s nose and mouth with your mouth, creating an airtight seal: This ensures that the breaths you provide are directed into the lungs.
  • Gently blow into the infant’s mouth until you see the chest rise: Give two breaths, each lasting about one second. Watching for chest rise confirms that air is entering the lungs.

Step 6: Continue CPR

Continue the cycle of 30 chest compressions followed by 2 rescue breaths until help arrives or the infant shows signs of life. It’s essential to maintain focus and rhythm throughout this process to maximize its effectiveness.

Practice and Preparedness

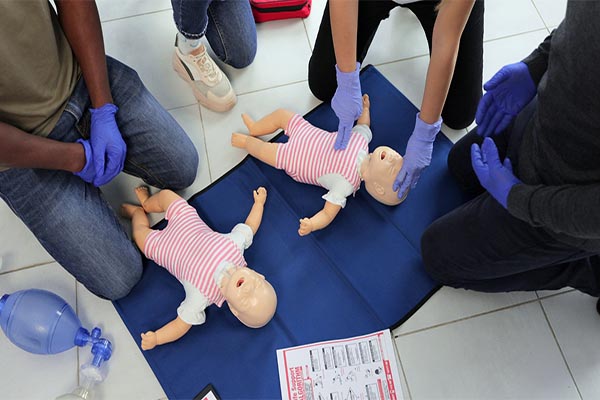
While we hope you never have to use these skills, being prepared can make all the difference. Readiness involves not only understanding the techniques but also being equipped to act without hesitation. Here are some ways to ensure you’re ready in case of an emergency:

  • Take a CPR Class: Attending a certified CPR course will provide hands-on practice and the confidence to act in an emergency. These classes often simulate real-life scenarios, allowing you to practice your responses.
  • Keep Emergency Numbers Handy: Have a list of emergency contacts, including your pediatrician and local emergency services, easily accessible. Quick access to these numbers can save precious time.
  • Educate Family Members and Caregivers: Ensure everyone who cares for your child knows CPR techniques and choking hazard prevention. Sharing this knowledge strengthens your support network and ensures that more people are prepared to help if needed.

Conclusion

Understanding choking hazards and knowing how to perform infant CPR are essential skills for parents and caregivers. By taking proactive steps to prevent choking and learning CPR techniques, you can help ensure the safety and well-being of your infant. These skills are not just beneficial; they are crucial in ensuring that you can act quickly and effectively in an emergency.

Remember, preparedness is key, and taking the time to learn these vital skills can make all the difference in protecting the ones you love. Stay informed, stay prepared, and keep your little one safe. By prioritizing education and readiness, you create a secure environment where your child can explore and grow with confidence.

Contact CPR Classes Near Me for Essential CPR and First Aid Training

Don’t wait until an emergency happens! Equip yourself with the life-saving skills needed to protect your infant. Contact CPR Classes Near Me today to enroll in comprehensive CPR and First Aid training. These classes will provide you with hands-on experience and the confidence to act swiftly in critical situations.

Ensure the safety of your child and those around you—reach out now to find a class that fits your schedule!

AHA BLS CPR & AED Classes

Starting at $59.95
American Heart Association BLS CPR & AED Certification 
Our CPR Trainers are American Heart Association Certified. We teach the best CPR Classes and deliver your certification eCard the same day. Get your AHA BLS CPR Certification and save now!

FAQ